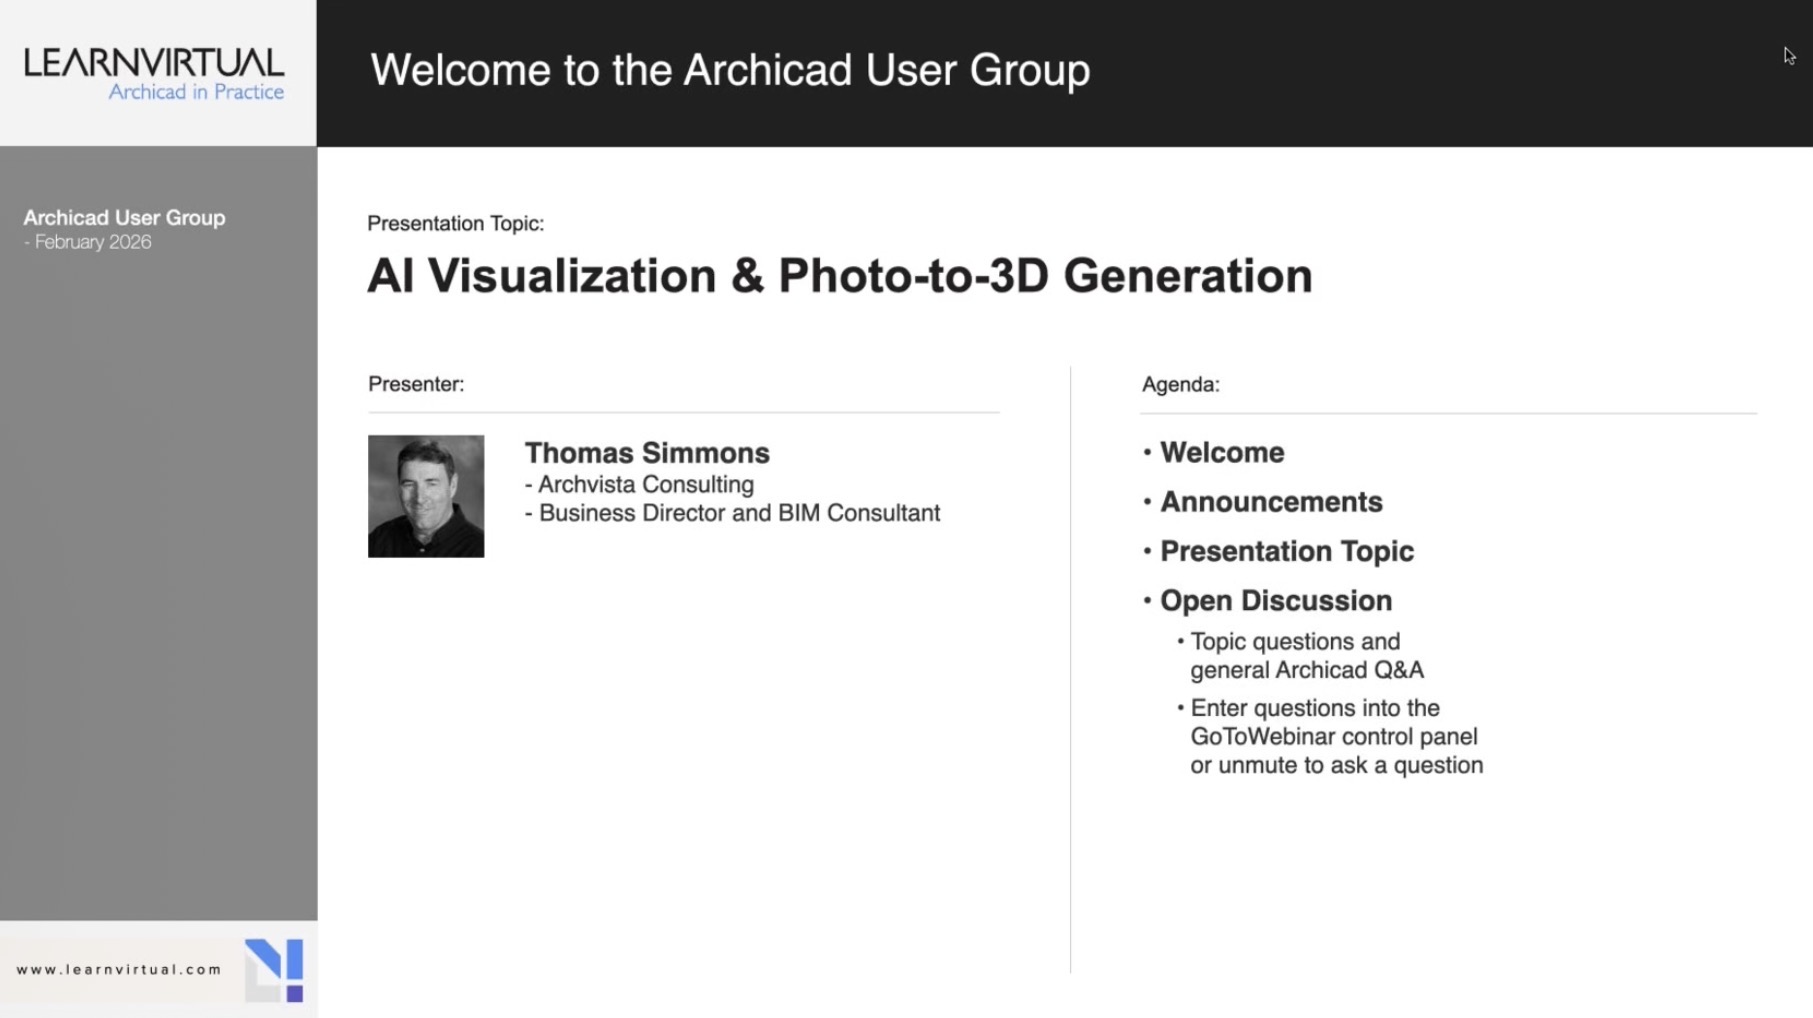
AI Integration & 3D Model Generator: Practical Workflows for Archicad Users
The latest Archicad User Group webinar explored one of the most exciting developments in BIM content creation: using AI to generate custom 3D models directly within ModelPort.
Presented by Tom Simmons, Business Director and BIM Consultant at Archvista Consulting, the session focused on practical workflows that help architects, interior designers, and landscape designers create, optimize, and manage AI-generated content without leaving their Archicad workflow.
Why AI-Generated Models Matter
Finding the right BIM content can be challenging. While object libraries offer thousands of options, projects often require unique items that don't exist in standard libraries.
The webinar demonstrated how AI can generate:
- Historic furniture and decorative elements
- Custom lighting fixtures
- Manufacturer-specific products
- Interior décor and accessories
- Plants and landscape elements
Instead of modeling these items manually, designers can now create them from a text prompt or a single image.
Workflow #1: Generate a 3D Model from a Text Prompt
One demonstration showed how users can create a custom object using only a written description.
For example:
"Create a 3D model of a six-foot-tall bird nest palm plant with green leaves and a square white planter."
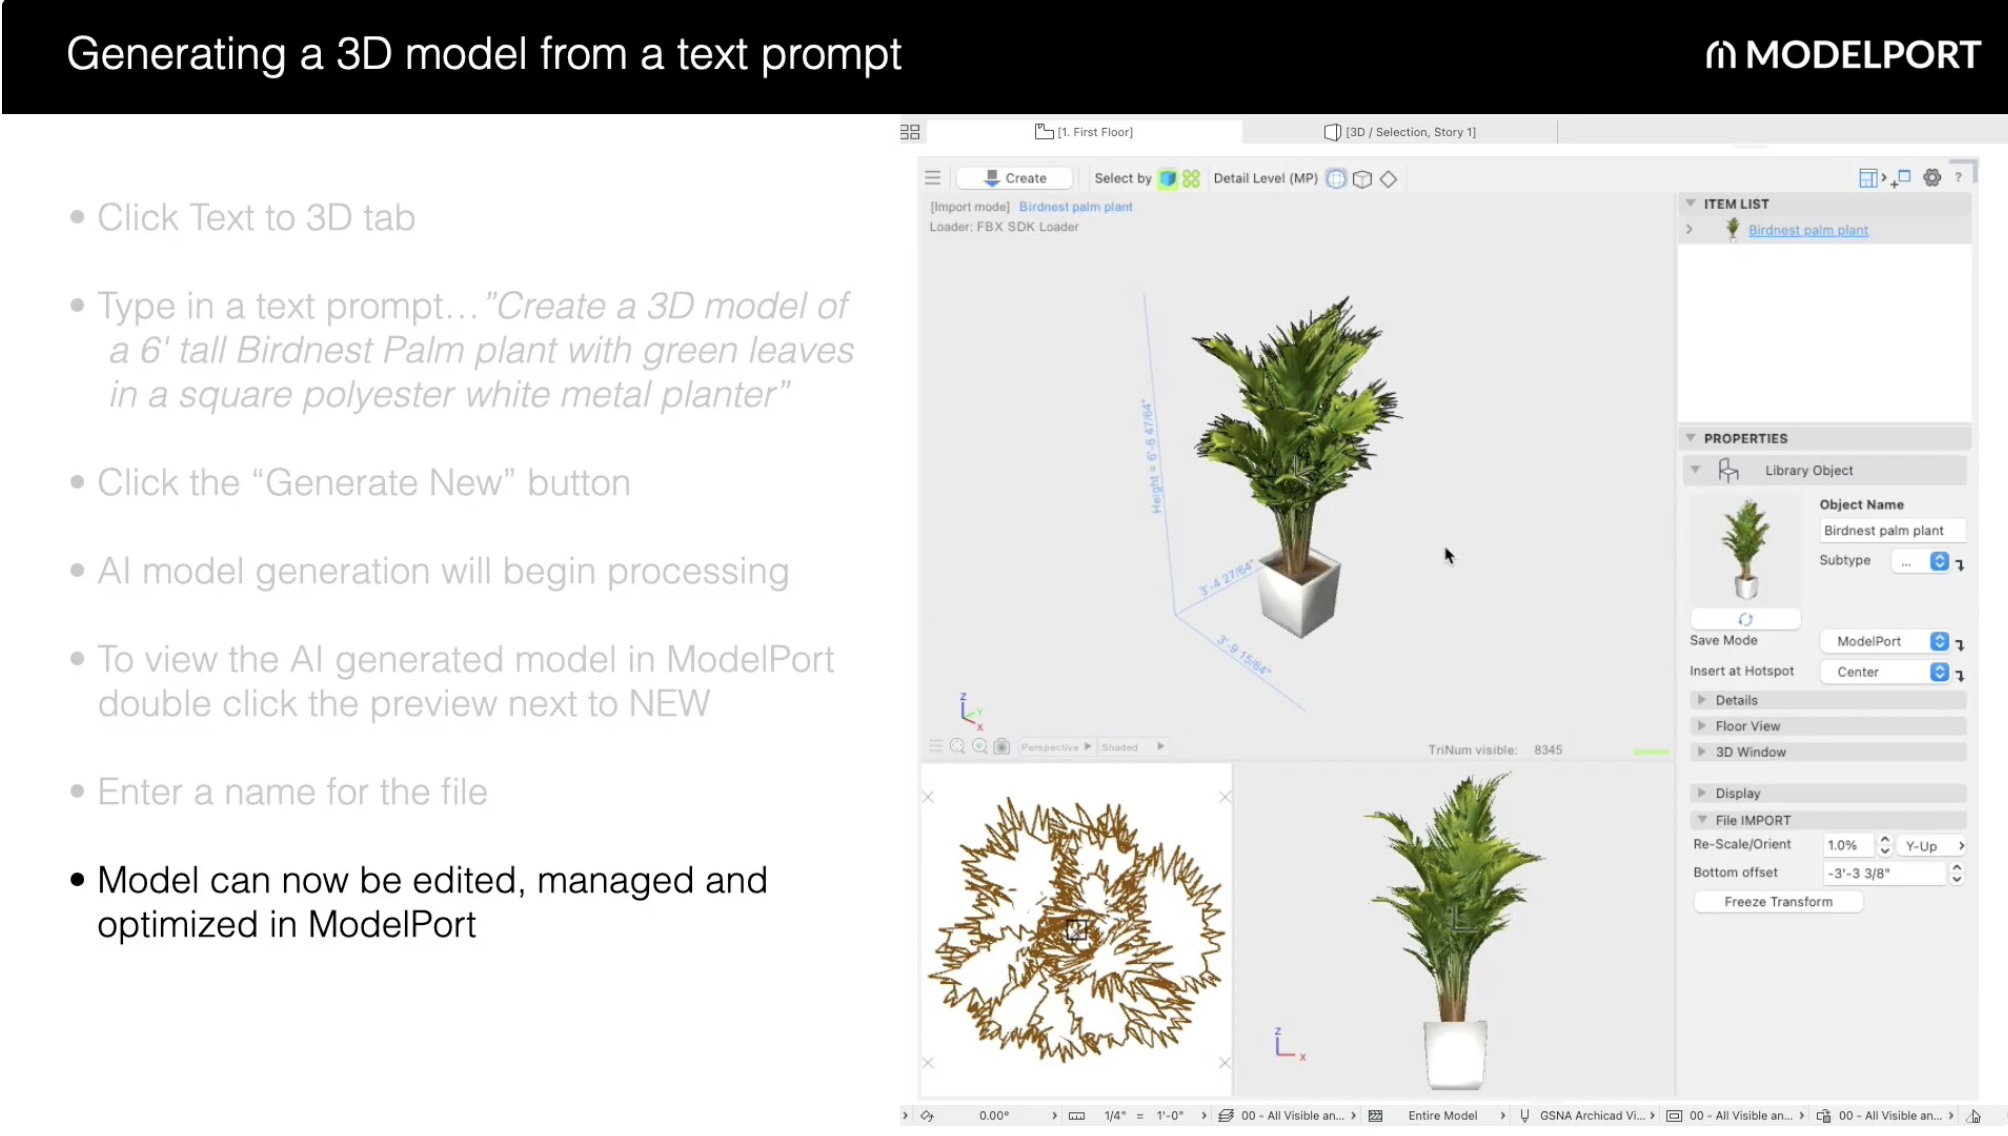
ModelPort can generate and import the object directly into your workflow.
Key Tip
Include details such as:
- Size
- Material
- Color
- Shape
- Object type
The more specific the prompt, the better the result.
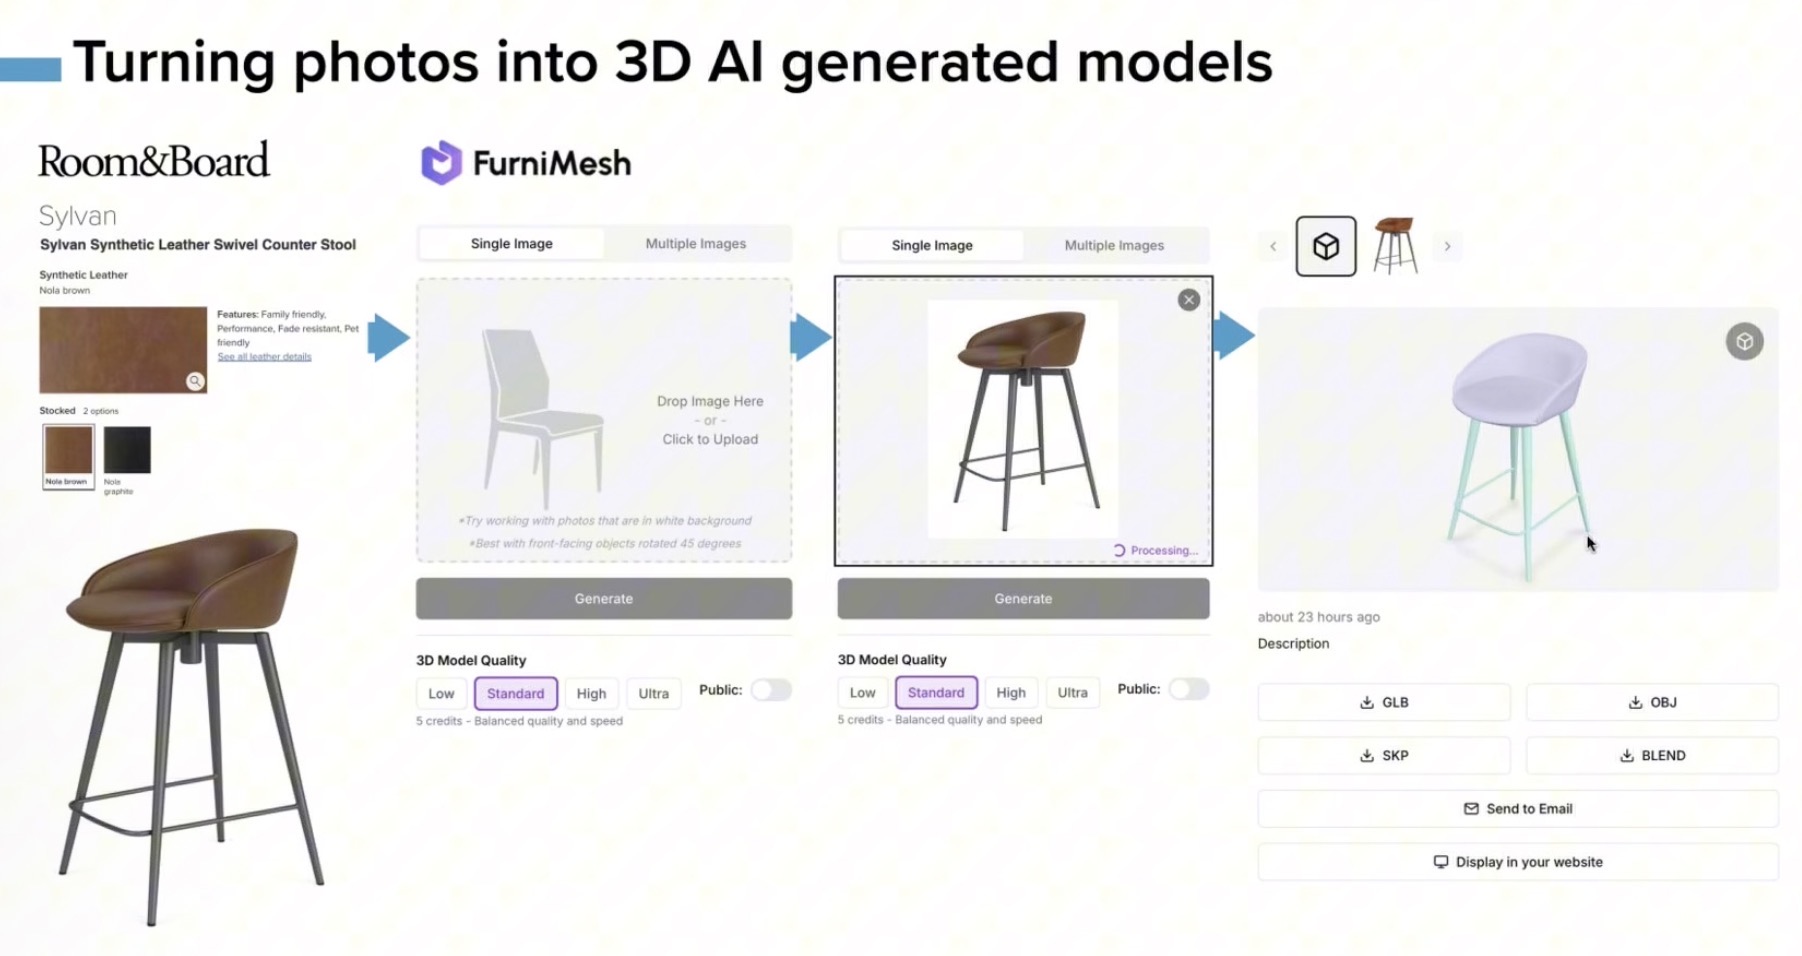
Workflow #2: Convert Product Images into 3D Models
One of the most practical workflows is creating 3D models from manufacturer imagery.
The process is simple:
- Find a product image online.
- Copy the image URL.
- Paste it into the AI Generator.
- Generate the model.
- Save it to ModelPort.
Ideal Use Cases
- Furniture
- Lighting fixtures
- Decorative accessories
- Historic restoration elements
- Custom client selections
This allows teams to quickly bring real-world products into their projects without waiting for manufacturers to provide BIM content.
The Most Important AI Modeling Tip: Control Polygon Count
Performance was a major focus of the webinar.
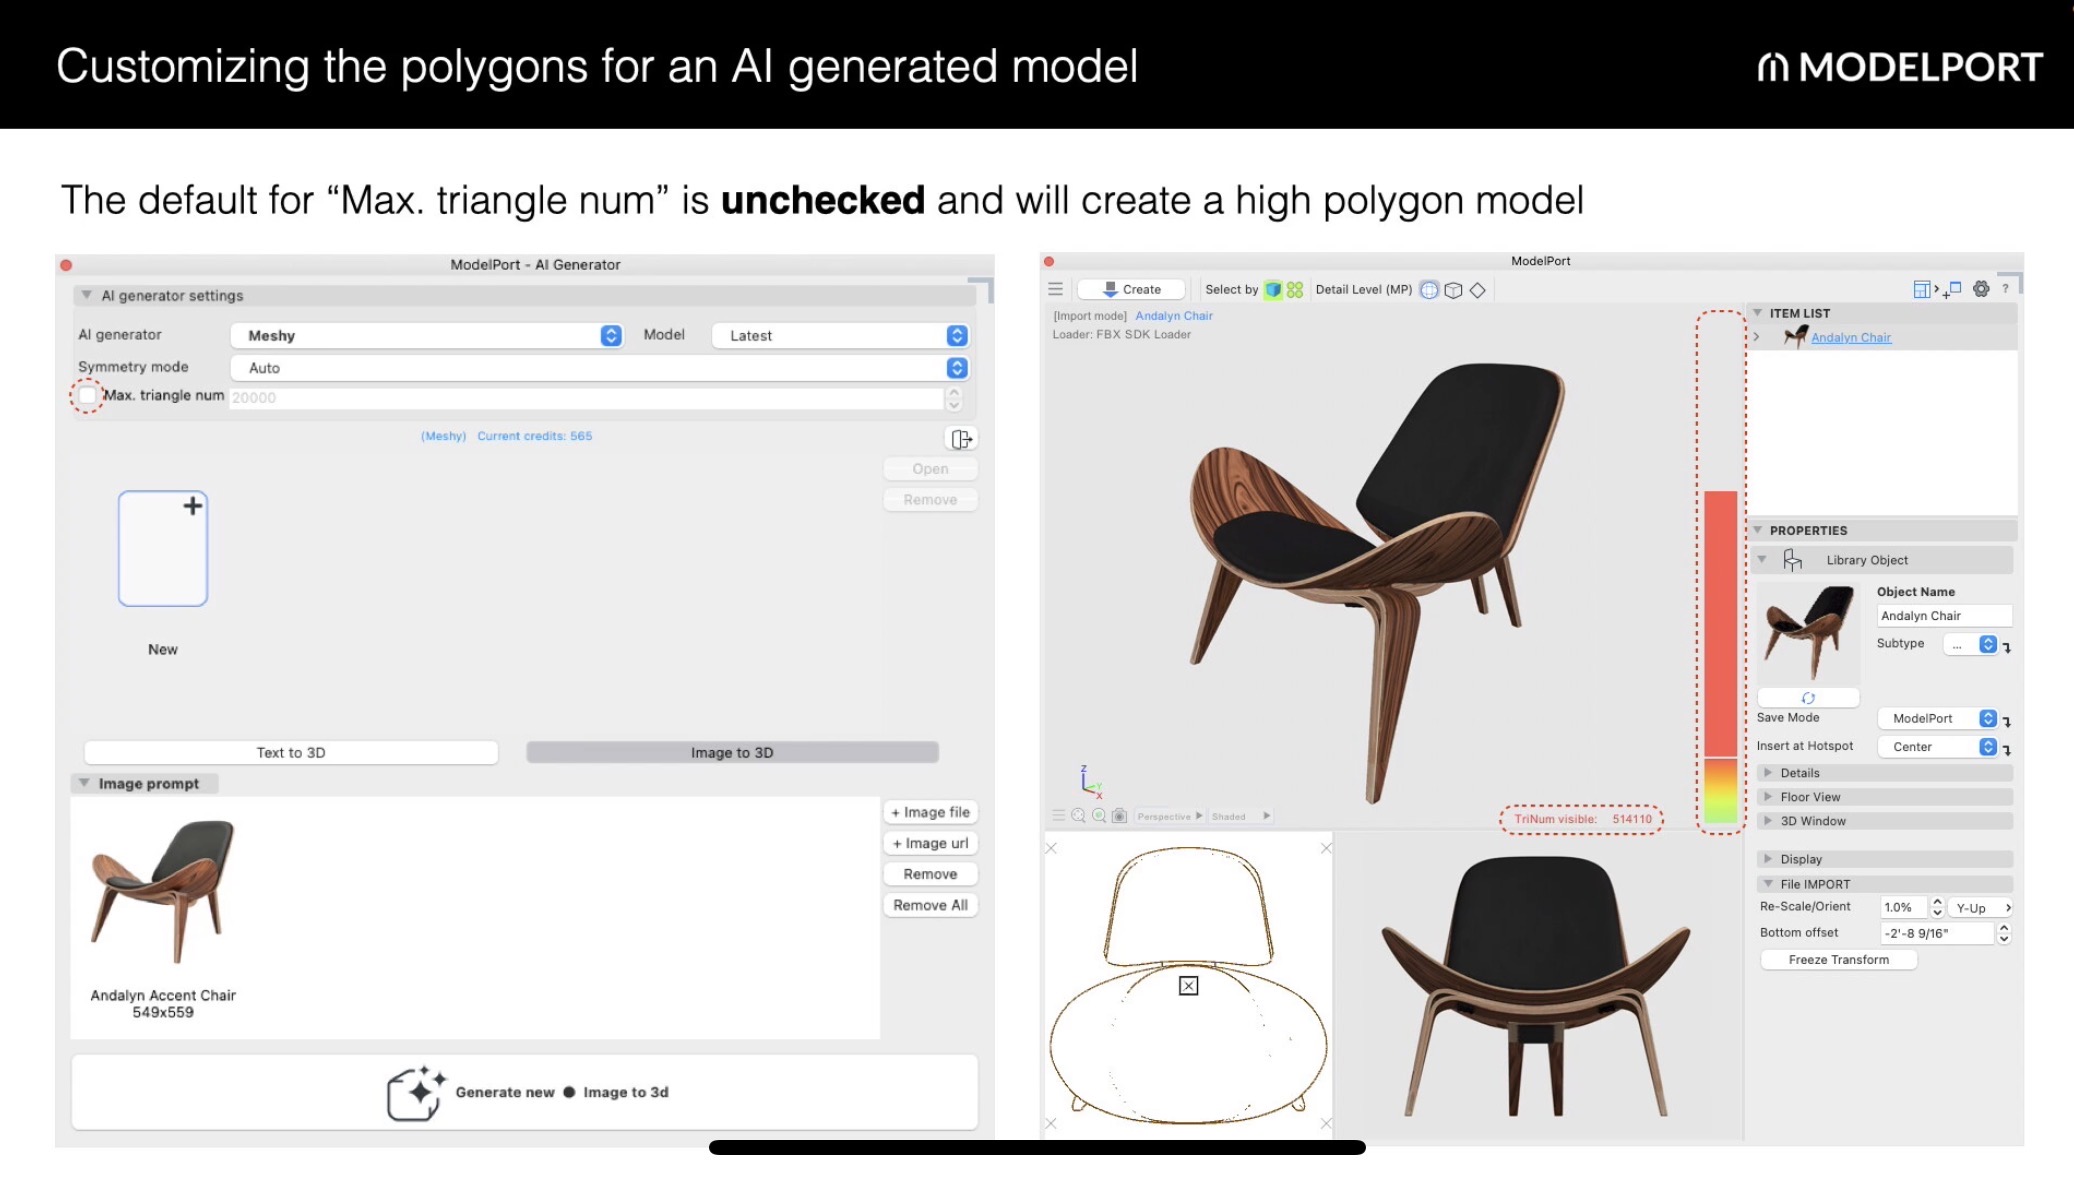
A chair generated at more than 500,000 polygons looked visually similar to one generated at roughly 10,000 polygons, highlighting an important lesson:
More polygons do not always mean a better BIM workflow.
Recommended Polygon Targets
- Minimum: 5,000 polygons
- Typical: 5,000–30,000 polygons
- Above 30,000 only when additional detail is necessary
A simple rule: if an object is a focal point in a rendering, higher detail may be justified. Background content should typically use lower polygon counts to maintain performance.
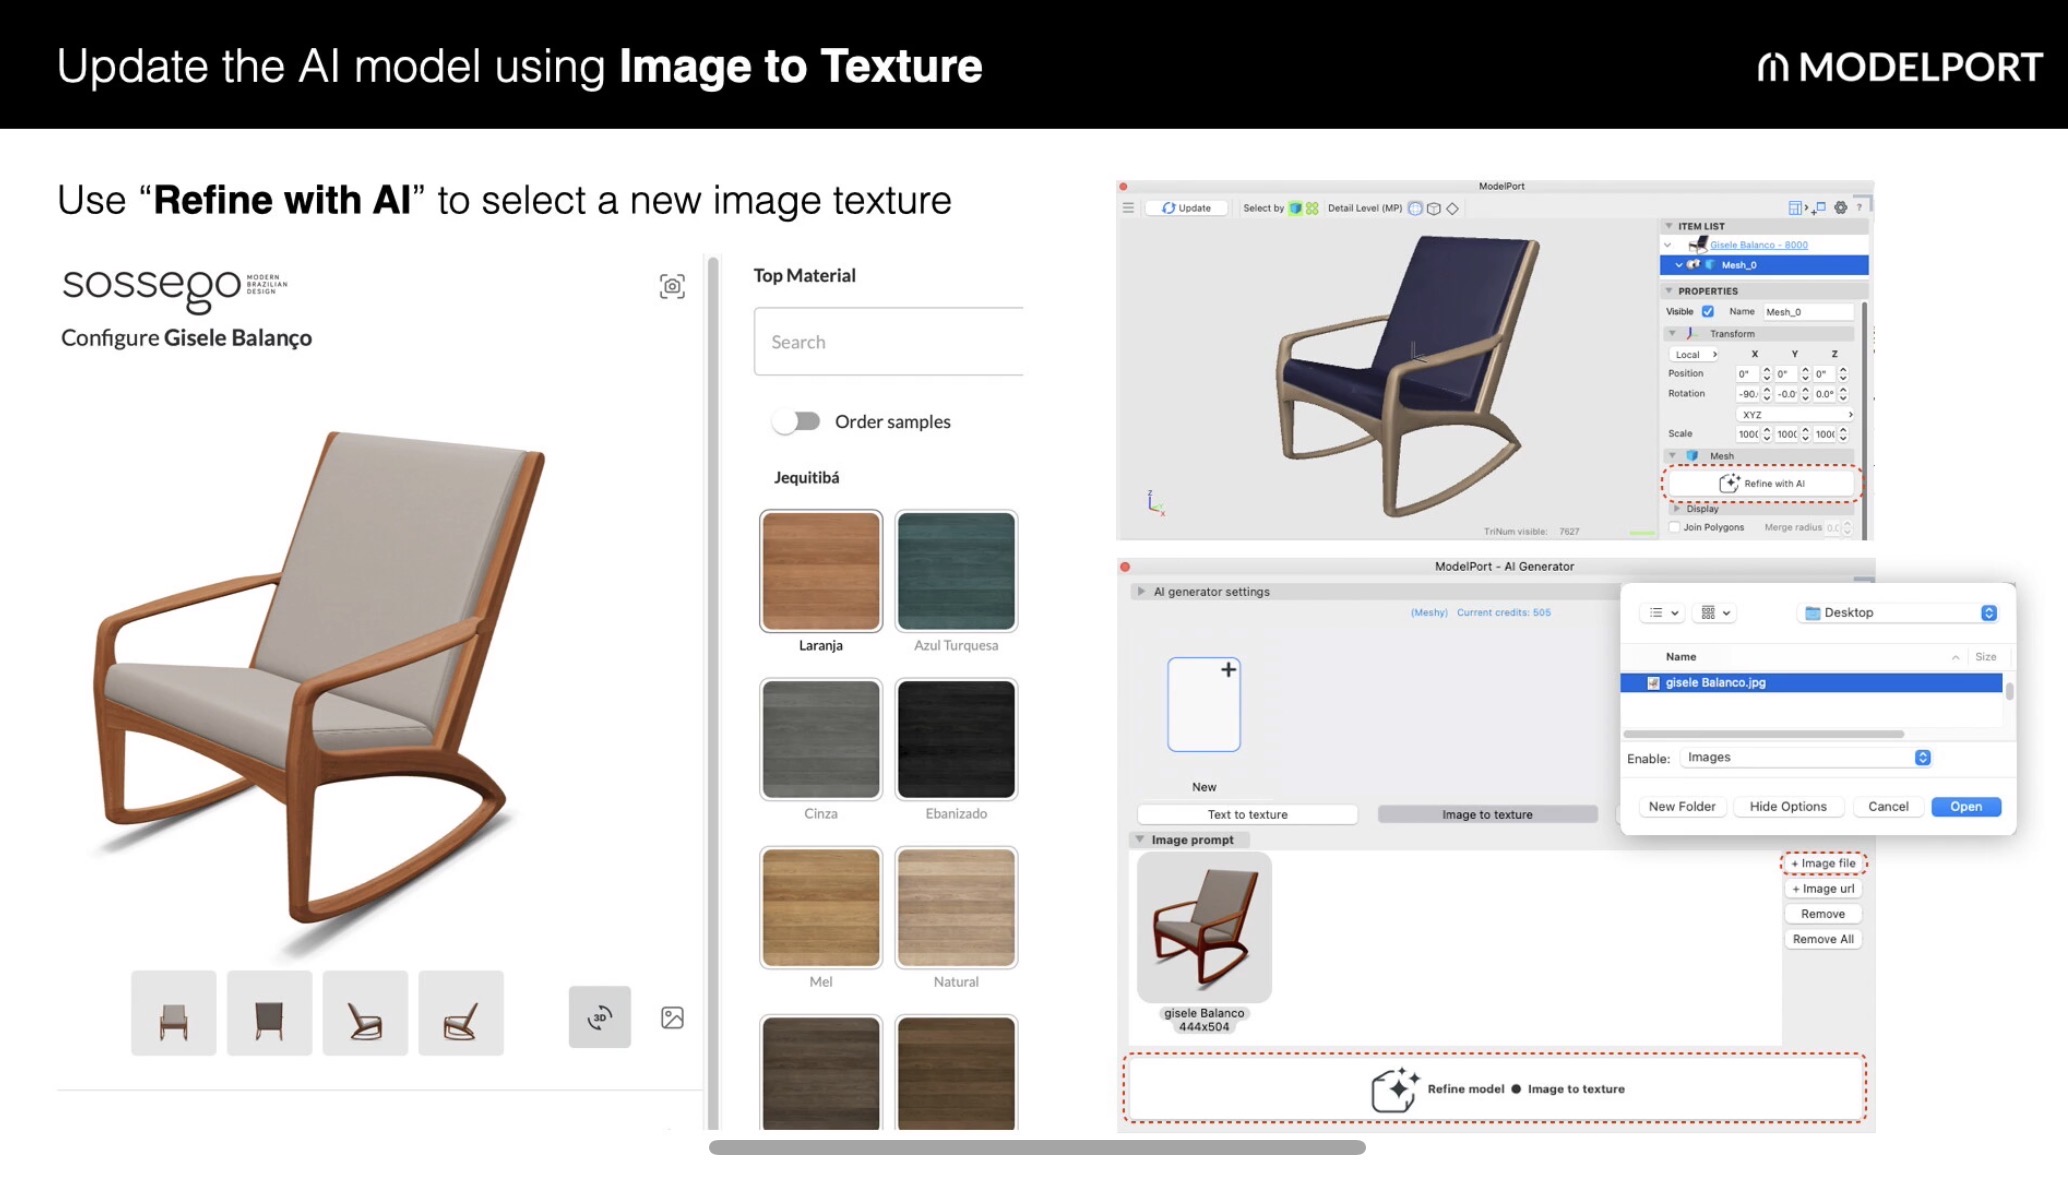
Workflow #3: Refine Existing AI Models
Instead of recreating a model when finishes change, users can update textures using the Refine with AI workflow.
- Open the existing model.
- Select Refine with AI.
- Choose Image to Texture.
- Upload a new product image.
- Generate updated textures.
This is especially useful for client revisions involving material, finish, or fabric changes.
Workflow #4: Use Remesh to Optimize Performance
The Remesh feature helps reduce polygon counts while maintaining visual quality.
Benefits include:
- Lower polygon counts
- Improved BIM performance
- Preservation of key model characteristics
- Reduced AI credit usage compared to generating a new model
A practical approach is to generate a higher-quality model first, then use Remesh to optimize it afterward.
Workflow #5: Leverage Detail Levels
ModelPort's Detail Level tools allow users to create multiple versions of an object and connect them to Archicad view settings.
This supports:
- High-detail presentation views
- Medium-detail design views
- Low-detail documentation views
The result is better performance without sacrificing visualization quality where it matters most.
Workflow #6: Clean Up AI-Generated 2D Symbols
AI-generated and imported objects often include messy 2D plan symbols.
The new workflow allows users to:
- Open the object in Archicad's Library Editor.
- Simplify the 2D symbol.
- Save the customized version.
- Preserve it during future ModelPort updates.
Clean 2D symbols help ensure clean documentation.
Workflow #7: Improve AI Textures
The webinar also covered simple ways to improve AI-generated textures.
When textures appear too dark, users can adjust:
- Ambient values
- Diffuse settings
- Specular properties
These adjustments can significantly improve rendered results without recreating the model.
Additional ModelPort Productivity Tips
The session also highlighted several productivity features:
- Preview objects before importing
- Edit by object or material
- Replace or update textures
- Remove unwanted geometry
- Generate automatic preview images
- Quickly rescale objects
- Move and rotate components
- Convert imported objects into light fixtures
Final Thoughts
AI-generated content is quickly becoming practical for everyday BIM workflows.
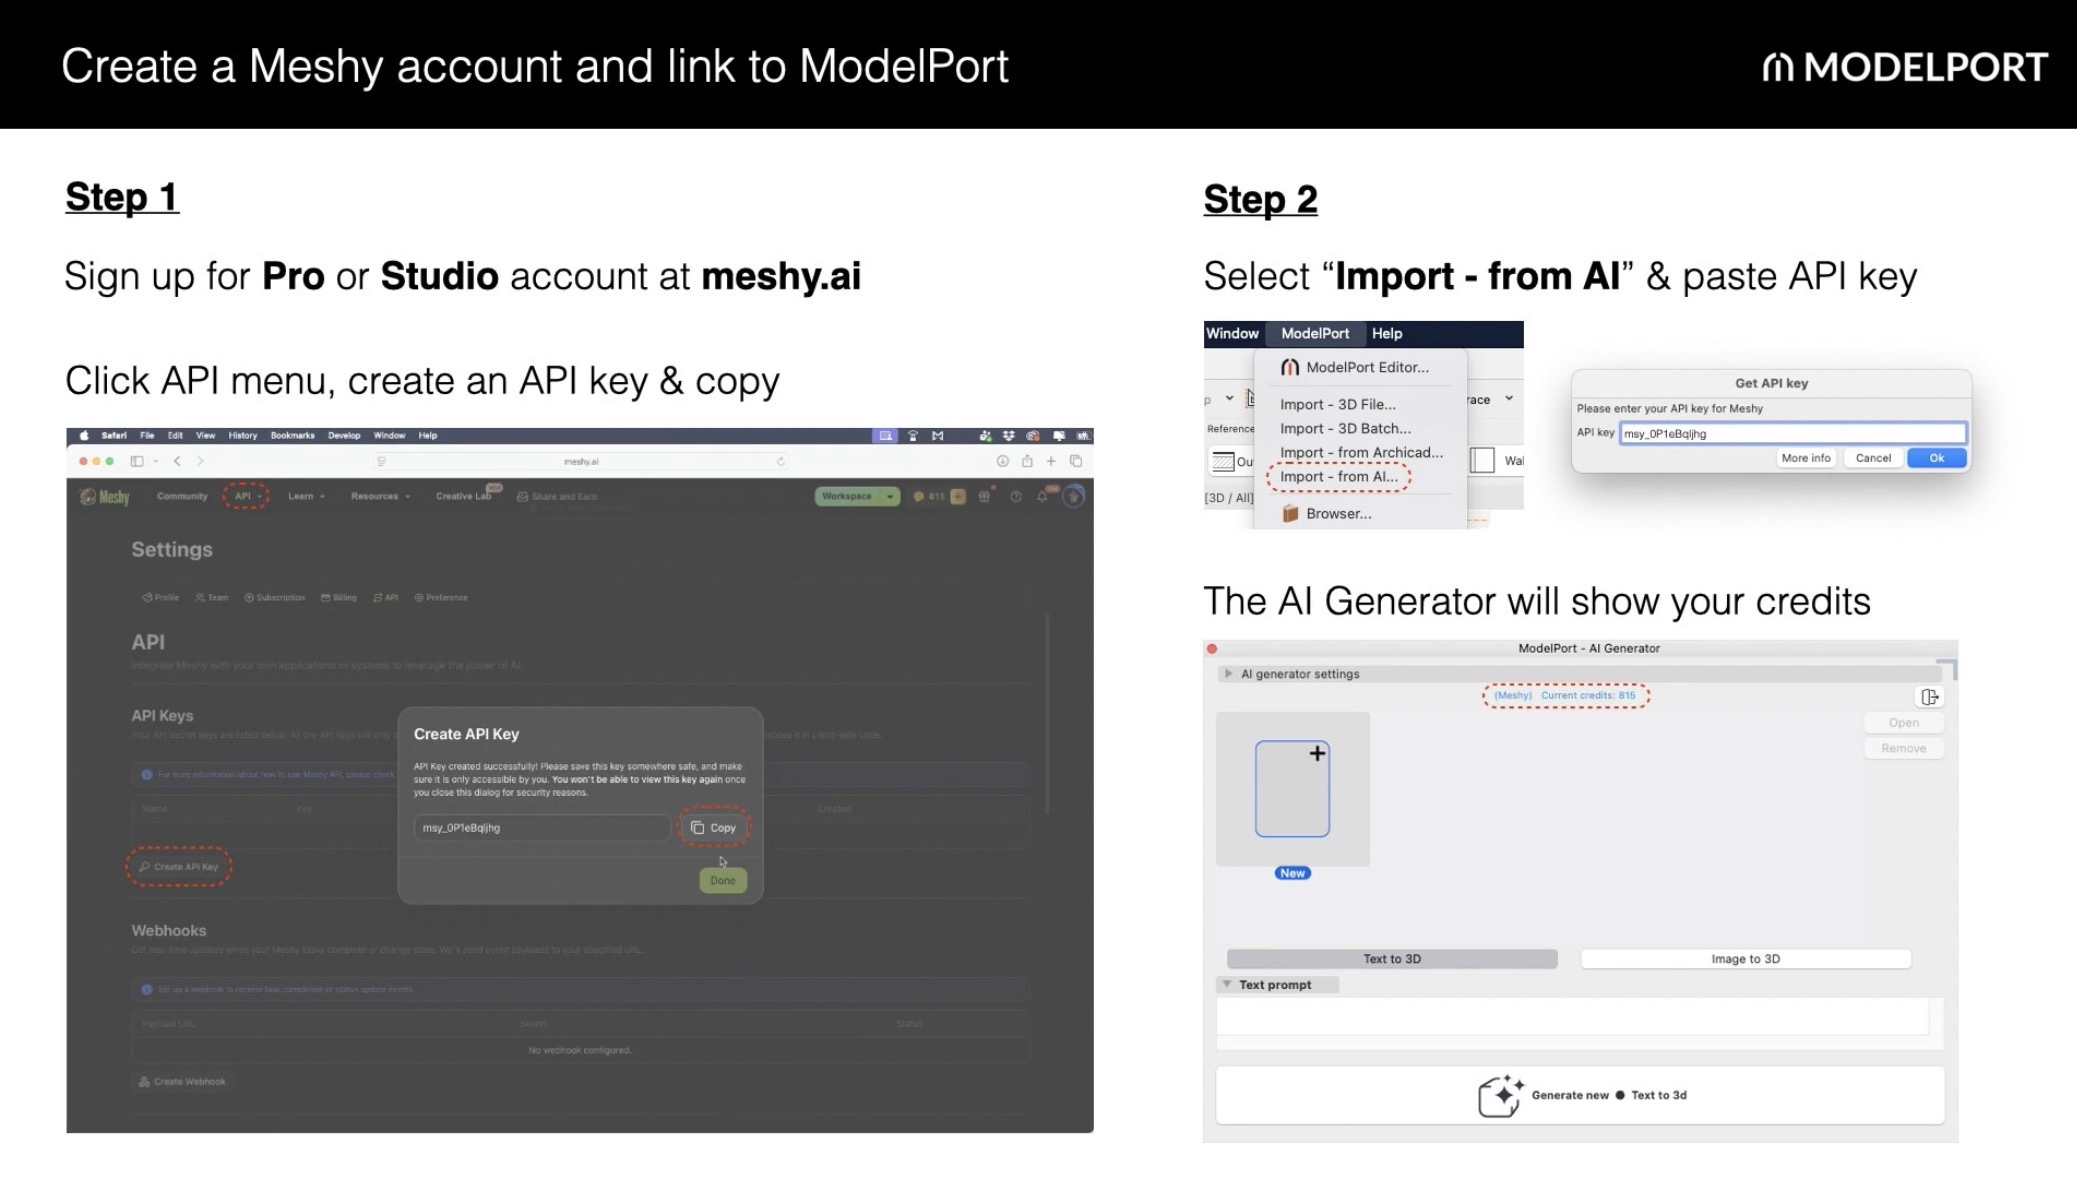
The combination of ModelPort and Meshy AI enables Archicad users to create custom content faster while maintaining control over performance, documentation quality, and visualization.
The key is not simply generating AI models, but refining, optimizing, and managing them effectively. By controlling polygon counts, leveraging remeshing tools, refining textures, and customizing symbols, designers can create project-ready content that performs efficiently inside a BIM environment.
For architects, interior designers, and landscape designers, these workflows offer a faster path from inspiration to implementation.
🎥 Watch the Full Video
This recap only scratches the surface. The full recording includes live demonstrations, real project workflows, and audience Q&A that bring these techniques to life.
To see demonstrations, examples, and full explanations, join the LearnVirtual User Group Plus Community or log in to your LearnVirtual account. User Group recordings are available to User Group Plus, Basic, and Premium LearnVirtual members.
If you would like to learn more we invite you to join Learnvirtual to access OnDemand lessons, In-Practice presentations and LIVE weekly lessons.
Stay connected with news and updates!
Join our mailing list to receive the latest news and updates from our team.
Don't worry, your information will not be shared.
We hate SPAM. We will never sell your information, for any reason.
